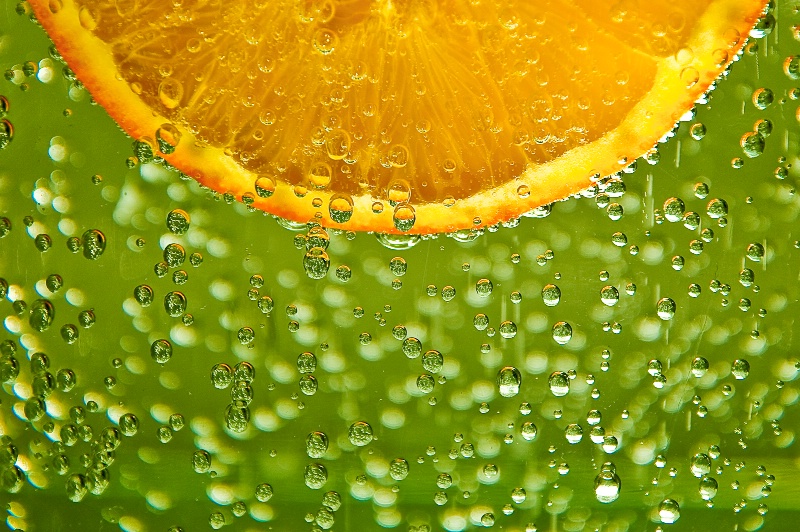
Orange Bubbles

Uploaded: November 18, 2010 23:29:37
1/25 sec f/5.6 ISO 100
Nikkor 24-105mm @105mm
Nancyj E. Hovey
 December 14, 2010
0
Usman M. Bajwa
 December 14, 2010
0
UB. #9101110
Donna La Mattino Pagakis December 14, 2010 0
Great details and design Martin! Congratulations on your finalist!! #9103217Martin J. Wells December 15, 2010 0
Thanks guys, I actually took the photo to enter into the first competition in the photography society at my workplace.To my surprise I won that competition so I was very happy. At the same time I entered here on betterphoto.com and forgot all about it until now. #9105316
Nancyj E. Hovey
 December 16, 2010
0
 #9108680
Usman M. Bajwa
 December 16, 2010
0
UB. #9109182
JO ANN CLEVELAND December 17, 2010 0
Congratulations on your 2nd Place winner Martin!jo ann c. #9111119
Donna La Mattino Pagakis December 21, 2010 0
Congratulations on your win Martin, I'm very happy for you! #9118185
Rosemary Sampson
 December 31, 2010
0
Martin J. Wells January 13, 2011 0
If anyone is wondering how to take such a shot I will explain in the following few posts. #9159731Martin J. Wells January 13, 2011 0
You need:1) An orangae (obviously).
2) A container (preferably glass but I used a perspex water filter).
3) Soda water (enough to fill the container).
4) A Light Box with 3 moveable lights.
5) A sheet of glass on which you place the container.
6) Something to place the under the glass sheet to raise it off the ground (I used 3 cans of zero alcohol beer - I finally found a use for these!).
7) Something to attach the slice of orange to the side of the container (I used a clothes peg).
8) A tripod.
9) A long lense (or preferably a macro lense).
10) A green background (or if not you can apply a green tint in Photoshop/LightRoom afterwards like I did).
See the following photos: #9159760
Martin J. Wells January 13, 2011 1
You need:1) An orangae (obviously).
2) A container (preferably glass but I used a perspex water filter).
3) Soda water (enough to fill the container).
4) A Light Box with 3 moveable lights.
5) A sheet of glass on which you place the container.
6) Something to place the under the glass sheet to raise it off the ground (I used 3 cans of zero alcohol beer - I finally found a use for these!).
7) Something to attach the slice of orange to the side of the container (I used a clothes peg).
8) A tripod.
9) A long lense (or preferably a macro lense).
10) A green background (or if not you can apply a green tint in Photoshop/LightRoom afterwards like I did).
See the following photos: #9159762
Martin J. Wells January 13, 2011 1
The post processing steps are described in the folloing shots.As you can see, to get the final image required a bit of work in Lightroom. #9159776
Usman M. Bajwa
 January 29, 2011
0
UB. #9200056
Katarina Mansson January 29, 2011 0
Exceelnet, beautiful photo and superb explanation of setup! Thanks and congrats! #9200058Katarina Mansson January 29, 2011 0
Excellent, beautiful photo and superb explanation of setup! Thanks and congratulations on your winner! #9200059
Chris Budny
 January 29, 2011
0
Nikki McDonald
 January 29, 2011
0
Karen E. Baumann January 29, 2011 0
Congratulations on your win, Martin! I loved reading the details of your setup and the shoot, and post processing! The green was an excellent choice in background color! #9200893
Michele Peterson
 January 29, 2011
0
Martin J. Wells January 31, 2011 0
Thanks again everybody. Regarding the homemade lightbox, I had no idea how big to make one so I went for too big rather than too small (110cm squared).The downside is that the lights I bought (3 x 150W halogen) are not strong enough if used outside the tent, the upside is that there is enough room to put them inside and bounce the light and that works well.
Another downside is that I could not find a roll of white paper wide enough, the upside is that I can easily change for other color paper, christmas wrapping paper or whatever.
The walls are bed sheets that I cut up and stapled on and I deliberately left 3 walls open (bottom, back and front) this way I can change the background/floor color to suit the subject.
The paper holder at the back is a curtain rail and holders on which to suspend the roll.
I just screwed all the wood together using corner joining brackets which is sturgy enough.
I hope this is useful. Martin #9203609
Chris Budny
 January 31, 2011
0
Karen E. Baumann January 31, 2011 0
Thank you, Martin! I am going to have my husband make one for me - I might try PVC for the supports, so it could be easily taken apart to be stored or moved. I like your ideas about the paper holder!!!Martin J. Wells February 01, 2011 0
There are some videos on youtube on how to make a lightbox. Perhaps these will give you some ideas.http://www.youtube.com/watch?v=BK4VVGWmMUs
http://www.youtube.com/watch?v=pZ-Cevn8-l8
http://www.youtube.com/watch?v=kuF5G7Cu-gs
http://www.youtube.com/watch?v=m0GMClynaBA #9205532
Sign up for an interactive online photography course to get critiques on your photos.
Discussions by Category: You can view photo discussions on various themes in the Community > Photo Discussions section of the site.
BetterPhoto Websites: If you see an orange website link directly under the photographer's name, it's totally okay. It's not spam. The reason: BetterPhoto is the one that offers these personal photography websites. We are supporting our clients with those links.
Unavailable EXIF: If there is no other information but 'Unavailable' in the EXIF (meaning no EXIF data exists with the photo), the 'Unavailable' blurb is not displayed. If there is any info, it shows. Many photos have the EXIF stripped out when people modify the image and resave it, before uploading.
The following truth is one of the core philosophies of BetterPhoto:
I hear, I forget.
I see, I remember.
I do, I understand.
You learn by doing. Take your next online photography class.
Copyright for this photo belongs solely to Martin J. Wells.
Images may not be copied, downloaded, or used in any way without the expressed, written permission of the photographer.
Log in to follow or message this photographer or report this photo.

I already have an account!


